Add someone once and Mays sends them what they need: employees get a text message with a link to the app, managers and admins get an email to set a web password.
Who can add people
- Admins can add anyone, with any role, at any location.
- Managers can add employees and other managers at the locations they're assigned to. They can't create admins, move an existing person to other locations, or give someone a role with a permission they don't have themselves.
Add someone on the web
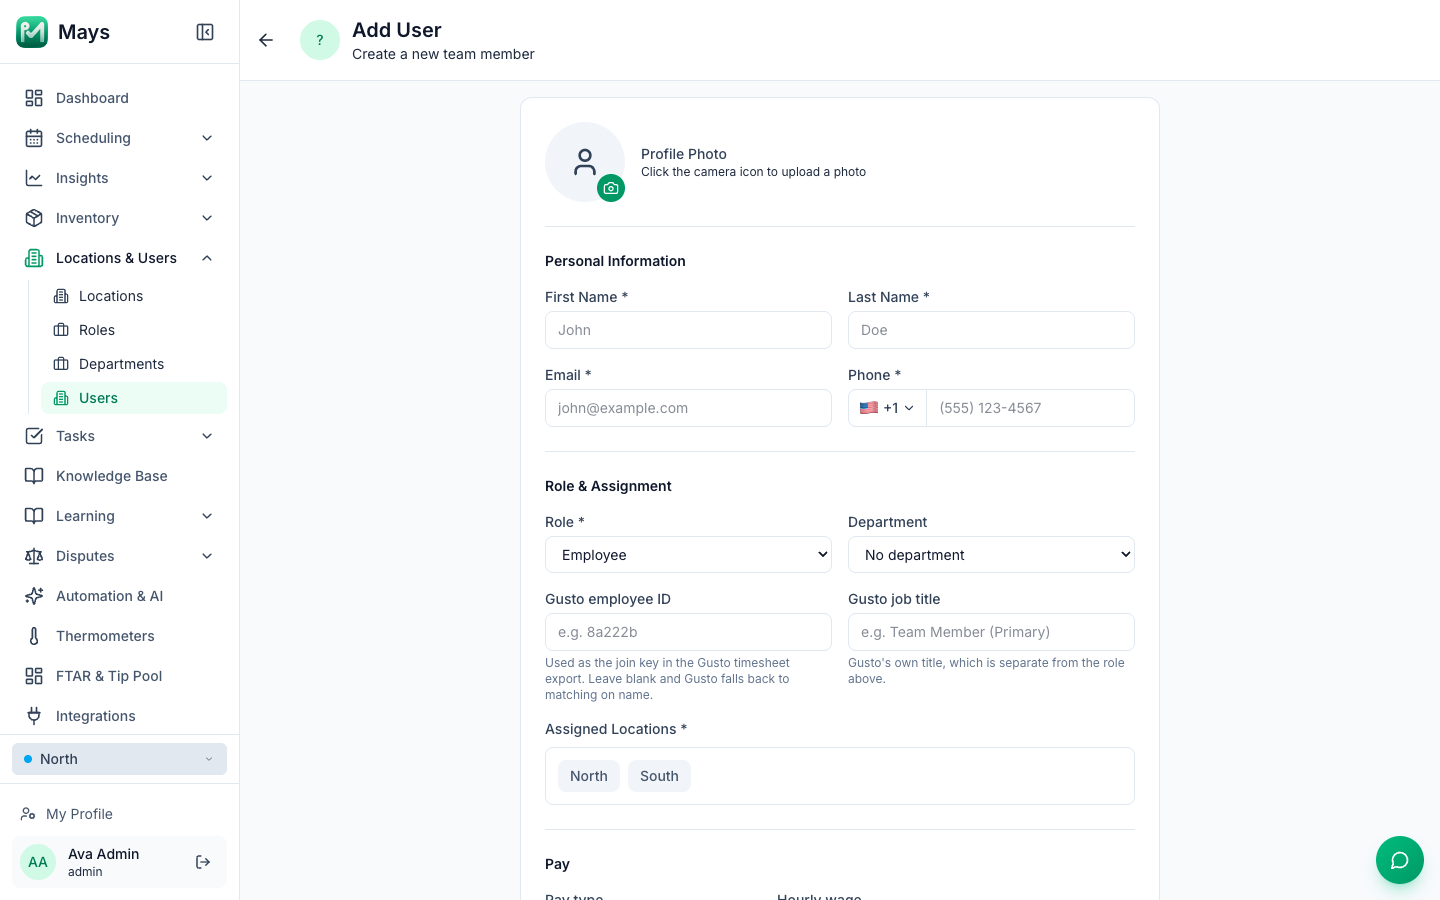
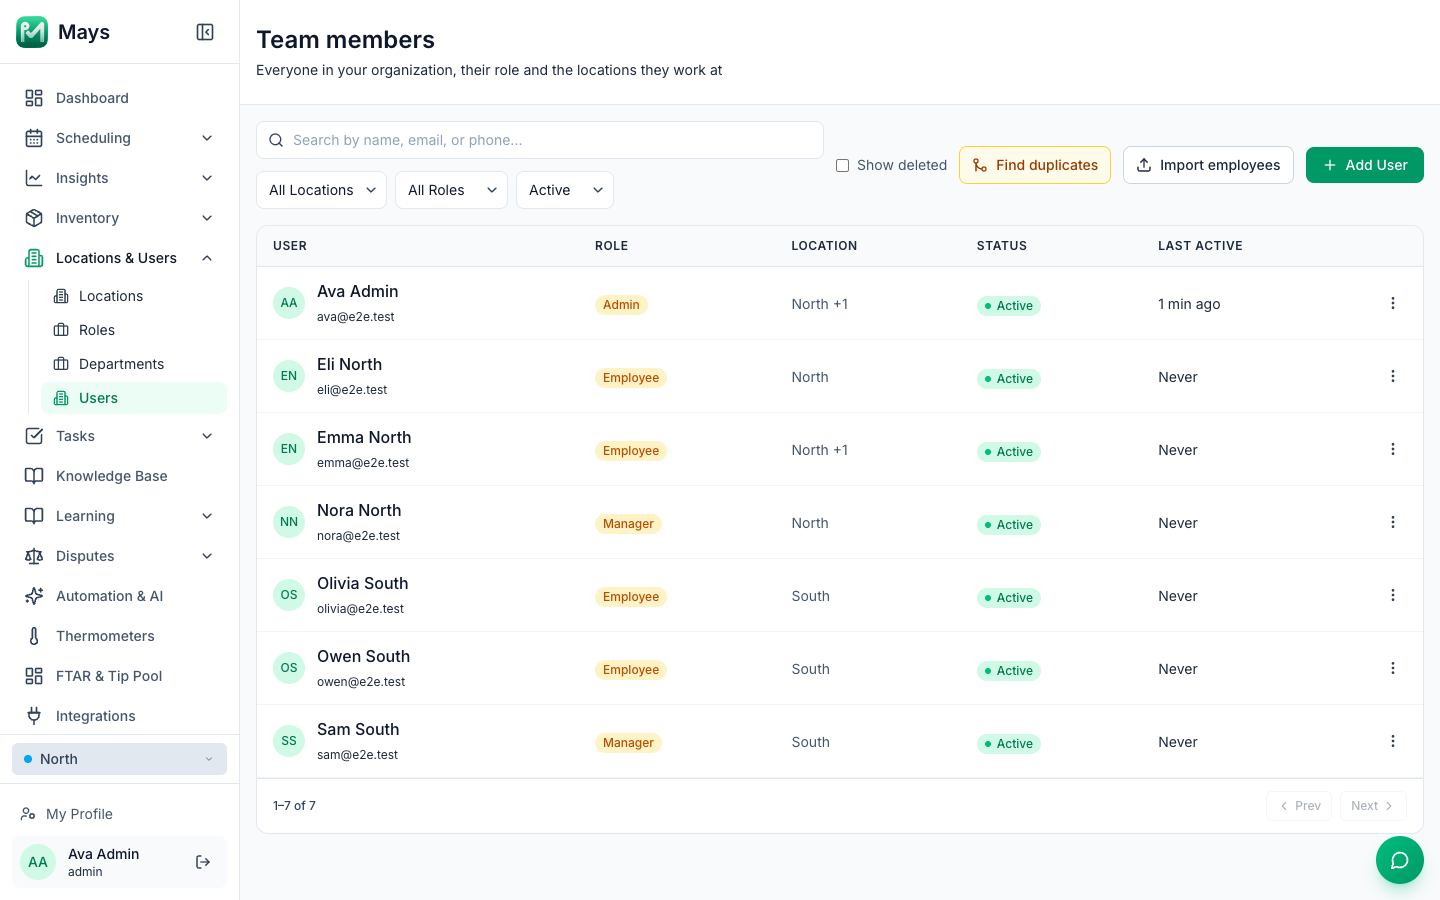
- Go to Locations & Users → Users (the page is called Team members) and click Add User.
- Under Personal Information, enter First Name, Last Name, Email and Phone — all four are required. The phone number is what they'll sign in to the app with, so use their own mobile number.
- Under Role & Assignment, choose the Role (it starts on Employee), optionally a Department, and click one or more Assigned Locations.
- Optionally fill in:
- Pay — Hourly or Weekly salary, and the amount. Leave it blank to use the default wage of the positions they work.
- Birthday — they get a celebration message on the day and their managers get a heads-up.
- Hire date — their first day of work. Paid sick leave waiting periods count from it; leave it empty and none applies.
- Notes, and a Profile Photo (click the camera icon).
- Click Create User.
Some settings only appear once the person exists — open them from the list to set their Scheduling Positions, meal-break waivers, Kiosk PIN and more.
What they receive
Role | What Mays sends | What they do |
|---|---|---|
Admin or Manager | An email, "(your company) invited you to Mays", with an Accept invitation button. | Click it, choose a password and click Activate account. The link works for 7 days. |
Employee (and any other role) | A text: "You've been added to (your company) on Mays. Download the app and sign in with this phone number: https://mays.app/get" | Install the app from the link and sign in with their phone number and the code Mays texts them. No password. |
Until they accept or sign in for the first time, they show as Pending in the list. Their first sign-in makes them Active.
Someone with a custom role who also needs the web app gets the text, not the email. They can set a web password with Forgot password? on the sign-in page, or you can send them Email Reset Link from their page.
Resend an invitation and check it arrived
- Resend: in the Team members list, click ⋮ → Resend Invite on a Pending person — or open them and click Resend Invitation under Account Actions. Mays sends the text or email again with a fresh 7-day link.
- Check delivery: open the person and scroll to Activity. Each text and email is listed — for example App download link texted to (•••) •••-1234 — delivered, or Invite email sent to j…@example.com. A line that says could not be texted or undelivered usually means the phone number is wrong: fix it, click Save Changes, and resend.
Add someone from the app (managers and admins)
- Tap your picture in the top-left corner to open Profile, then tap Team.
- On iPhone tap + at the top right; on Android tap Add team member.
- Enter First name, Last name and Phone. Email is optional in the app — add it for managers and admins, who get their invitation by email.
- Pick the Role and the location: on iPhone you can tick several under Branches; on Android pick one Branch.
- Optionally set a wage (Hourly or Weekly salary), then tap Add (iPhone) or Add team member (Android).
They receive the same text or email as when you add them on the web.
Good to know
- Each email address can only be used once in your organization. To find people who were added twice, use Find duplicates on the Team members page (admins).
- Kiosk PIN: everyone added on the web gets a 4-digit PIN for shared kiosk tablets, shown on the person's page under Kiosk PIN (Reveal, Change, Regenerate). Admins can see anyone's PIN; managers can see and change the PINs of staff at their own locations — not other managers' or admins'. The person sees their own PIN in their app profile.
- Gusto employee ID, Gusto job title and AI photo auto-reject are only kept when you edit an existing person — set them after you've created them.
- Food handler cards and other certificates: once someone is added, keep their cards and expiry dates under Certificates on their page. The section is there while Labor law compliance's Food safety certificates is on at one of their locations. See Food safety certificates.
- Adding many people at once? Use Import employees — see Import employees from a spreadsheet.
- To take someone's access away, open them and click Deactivate User.