Before you build your first schedule, tell Mays how each location schedules: in Mays or in 7shifts, which day its week starts, and who should appear on the schedule.
Scheduling is part of the Pro plan (and the 30-day free trial). If your plan doesn't include it, Scheduling shows a small lock in the sidebar and opening it says "Scheduling isn't included in your plan" with an Upgrade plan button; the apps have no Schedule tab.
Open a location's scheduling settings
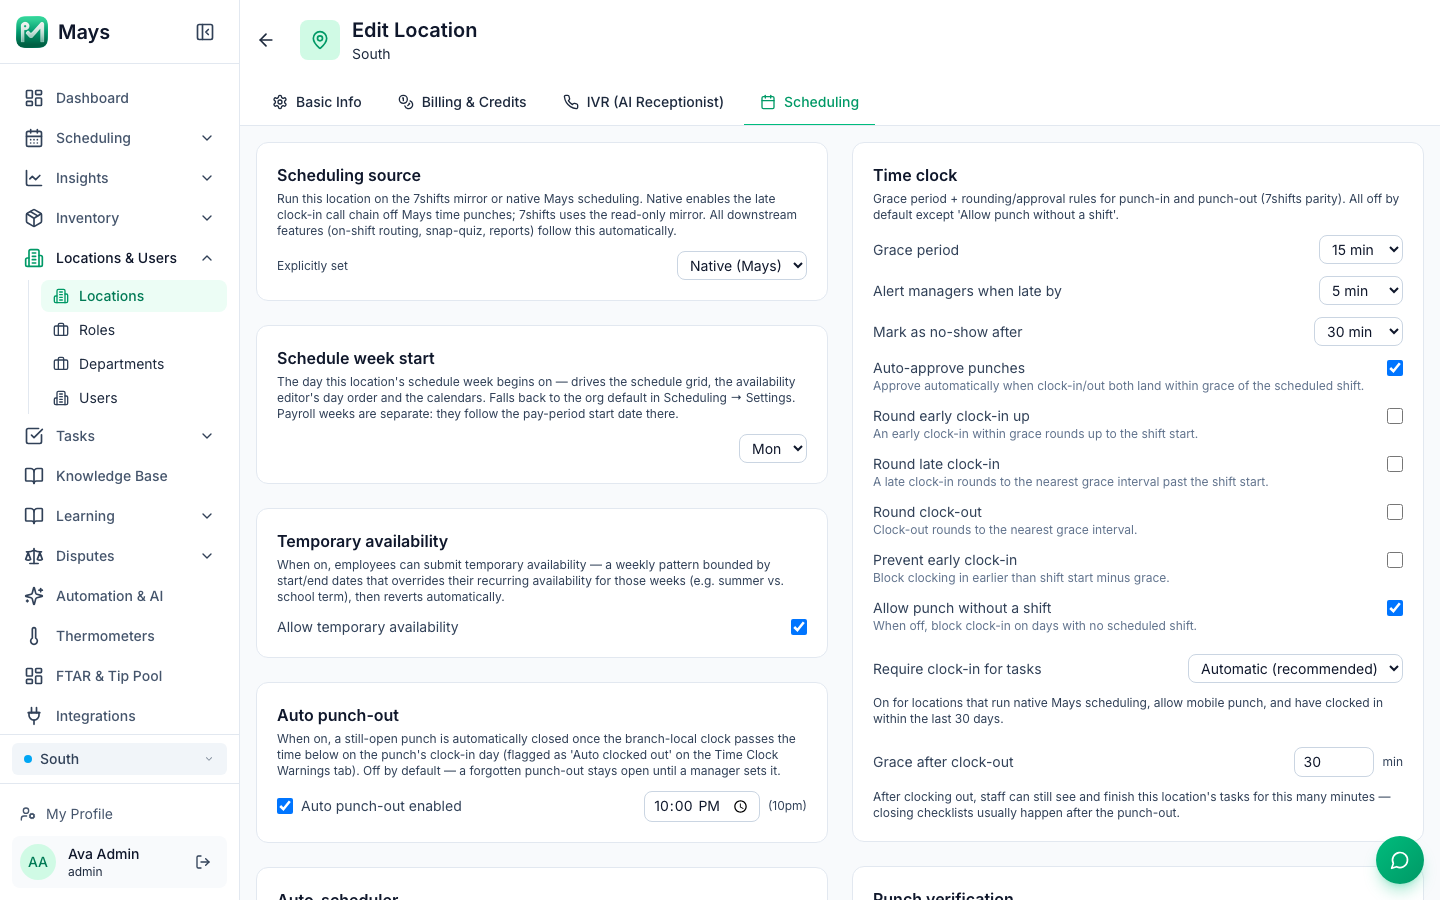
- Go to Locations & Users → Locations and click the location.
- On the Edit Location page, open the Scheduling tab.
You can also go to Scheduling → Settings and click a location's name at the top of the page.
Every setting on this tab saves as soon as you change it — there's no Save button.
Choose where the schedule lives
The Scheduling source card has two choices:
Choice | Use it when |
|---|---|
Native (Mays) | You build and publish the schedule in Mays. Your team sees it in the Schedule tab of the app. This is what the rest of the scheduling articles describe. |
7shifts mirror | The location still builds its schedule in 7shifts. Mays reads who's working from 7shifts for things that need to know who's on shift — sending tasks to the people on shift, late clock-in calls and reports. |
With 7shifts mirror, the Mays schedule screens still work, but those features follow 7shifts rather than shifts built in Mays. The Schedule tab in the app only shows shifts built in Mays, so your team keeps using 7shifts to see their shifts. The Time Clock's Today view isn't available for these locations yet.
The card says Explicitly set once someone has picked a source, and Auto-resolved if nobody has. An auto-resolved location switches to 7shifts mirror by itself as soon as a 7shifts connection covers it, so pick the source on purpose.
Moving from 7shifts to Mays? An admin can turn on Scheduling data sync under Integrations → 7shifts. Mays then copies your 7shifts shifts, time off, availability, positions and wages into Mays and switches the connected locations to Native (Mays). Anything copied from 7shifts carries a 7shifts badge; once you edit it in Mays, 7shifts stops updating it. Changes you make in Mays aren't sent back to 7shifts.
Set the day the week starts
The Schedule week start card picks the day this location's schedule week begins — the first column of the schedule grid, the week the team sees in the app, and the week you publish.
- A location that has never been changed follows the organization's day: Scheduling → Settings → Workweek & overtime → Schedule week starts on (Monday unless an admin changed it). Only admins see that setting.
- Once you pick a day on the location, it keeps that day even if the organization's day changes later.
- Payroll weeks are separate — they follow the pay-period start date in Scheduling → Settings.
Choose who appears on the schedule
- Go to Scheduling → Schedule (the page follows the location picked at the bottom of the sidebar).
- Click Manage staff.
- Tick Scheduled for everyone you schedule, and untick the rest.
- Drag people by the handle to set the order of the rows.
- Click Save.
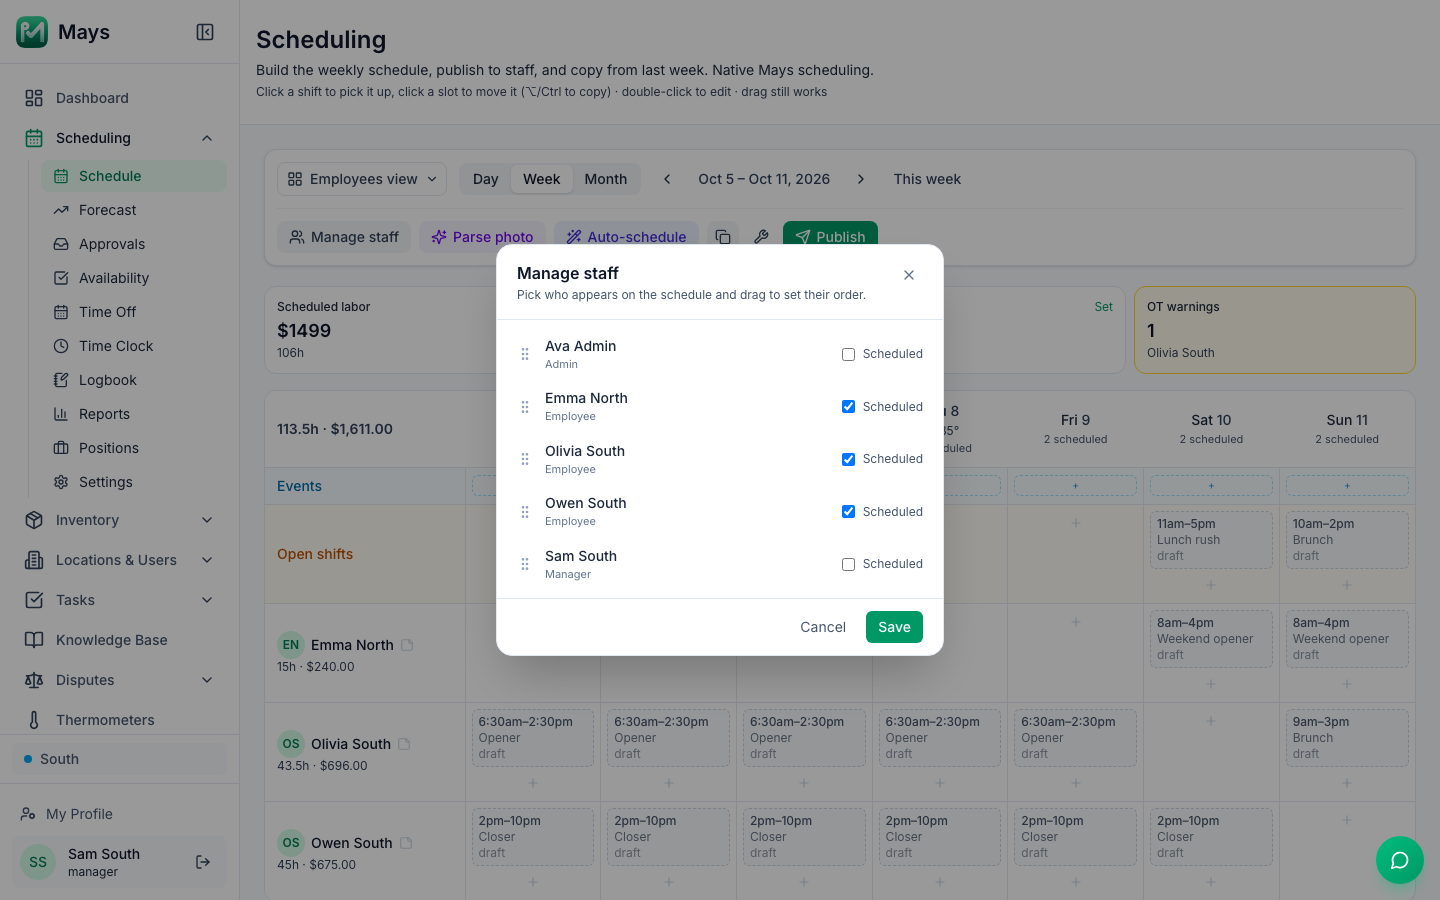
- The list shows everyone assigned to the location. To add someone, assign them to the location on their page under Locations & Users → Users first — see Add and invite team members.
- Employees start out Scheduled; admins and managers don't, so tick yourself if you work shifts.
- On the web, only Scheduled people can be picked for a new shift. Unticking someone never hides shifts they already have that week.
- The order you save is the order of the rows on the schedule grid.
Other settings on the Scheduling tab
The same tab holds the location's other scheduling rules. The ones you'll meet in the next articles:
- Temporary availability — lets staff send availability for a date range (on by default). See Setting your availability.
- Shift confirmations — staff tap Confirm on each published shift (on by default). See Your schedule in the app.
- Event reminders — the morning push about events on the schedule (on by default).
- Labor & compliance — break rules, including the break warning before you publish. See Labor & compliance (per location).
- Time clock, Punch verification, NFC punch tags, Auto punch-out, Auto-scheduler and Tip pool — how clocking in works and what the scheduling assistant may do.
Who can do this
- Admins can change any location; managers can change the locations they're assigned to (anyone whose role can build the schedule).
- The organization-wide settings in Scheduling → Settings — the default week start, pay periods, overtime, approvals and time-off categories — are for admins only. Managers see a note that an admin manages them.
- All of this is on the web; the apps use what you set here.
Good to know
- Next, set up your jobs and pay — see Positions and wages — then build the weekly schedule.
- If a change doesn't stick (the box snaps back), your role can't change scheduling settings for that location. Ask an admin.
- Staff use the Schedule tab of the app for their shifts, and can add them to their own calendar — see Calendar sync.