Insights → Labor Cost compares staffing with sales hour by hour, sets scheduled hours against hours worked, and tracks labor cost as a share of sales.
Who: admins. Anyone else needs a custom role with the View insights permission, and then sees only the locations they work at. Insights is part of every plan, on the web app only.
Hours come from the schedule and the time clock, labor cost from wages, and sales from a connected POS (Square or Union POS).
Open Labor Cost
- Go to Insights → Labor Cost. It has three tabs: Hourly Metrics, Labor Variance and Labor Cost Trend.
- Click the date button to change the dates. The page starts on the last 14 days, today included.
- Under Filter data, pick the Branches (locations) to include. The page opens on the location picked at the bottom of the sidebar.
- Turn on Only hourly employees to leave out people on a weekly salary.
Hourly Metrics: when you're over- or under-staffed
The Staffing vs Revenue Heatmap has a row for every half hour and a column for each day of the week, plus Avg. Each cell is the average for that half hour on that weekday across your dates. For example, the Monday column averages every Monday in the range.
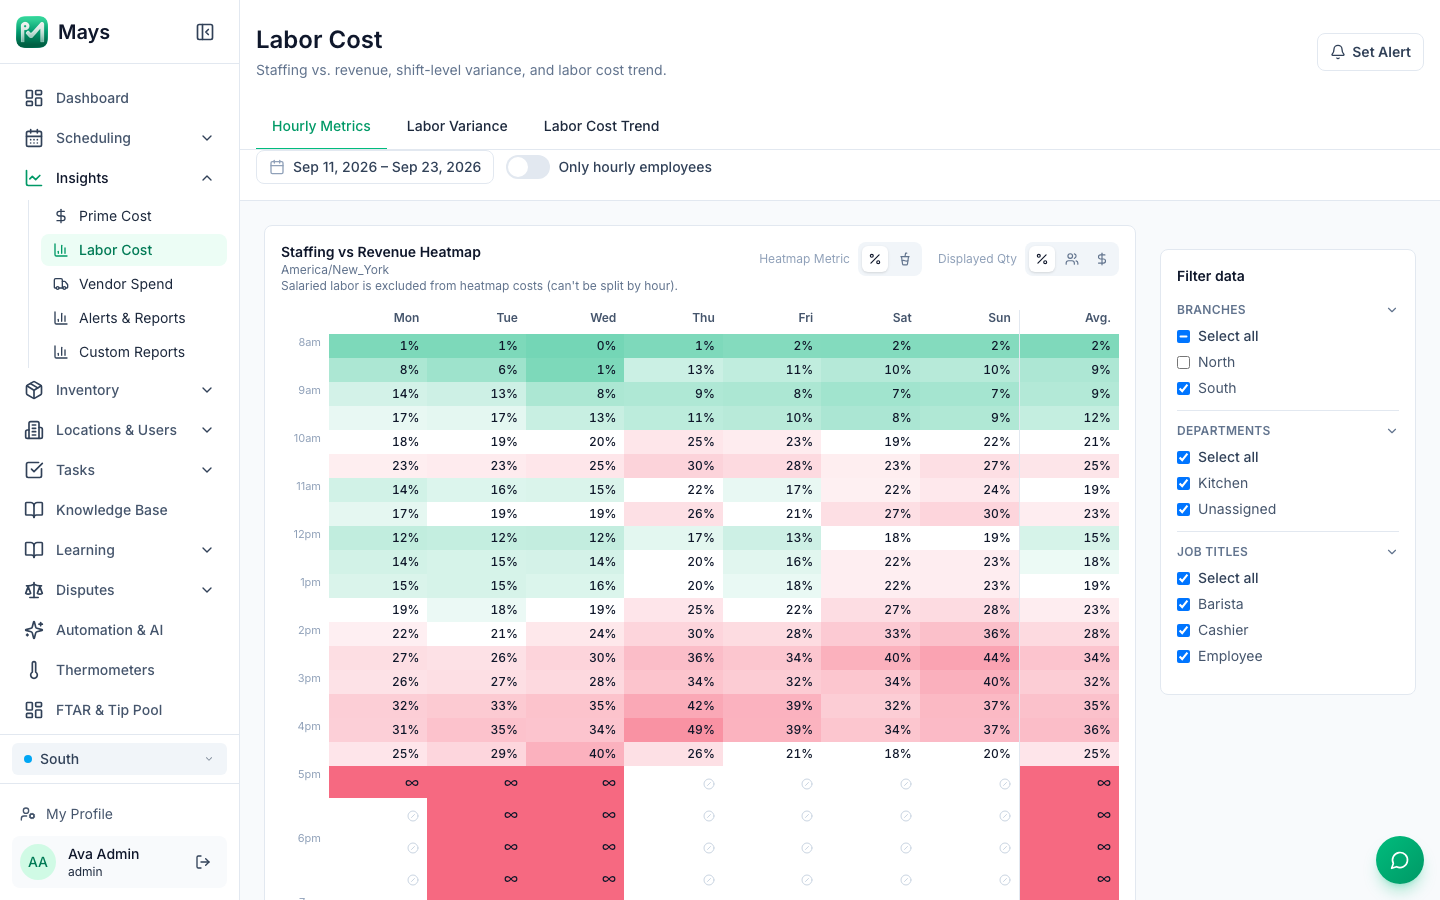
- Heatmap Metric colours the cells by labor % of revenue, or by revenue.
- Displayed Qty chooses what's written in each cell: labor % of revenue, clocked-in employees or labor cost.
- Colours: green at 18% or less (the lower, the greener), no colour between 18% and 22%, and red from 22% (the higher, the redder).
- ∞ means people were working but there were no sales in that half hour. A crossed-out circle means there was neither.
- People on a weekly salary aren't in the heatmap's costs, because a salary can't be split by the hour.
Below the heatmap, Scheduled vs. Actual Hours by Hour of Day shows, for each hour of the day, the Scheduled Hrs, Actual Hrs, Scheduled Emp. and Clocked-in Emp. added up over your dates. Click a job title above the chart to see only that one, or All job titles.
Labor Variance: schedule vs time clock
This tab compares what was scheduled with what was worked. Choose Day, Week or Month.
- The chart, Labor hours: Scheduled vs Actual, draws scheduled hours in blue and worked hours in red. The icons in its corner switch between hours and employees.
- The table has a row per day (or week, or month), newest first, with Scheduled Shifts, Actual Shifts, Shifts Variance, Scheduled Hours, Actual Hours and Hours Variance. Click a column header to sort.
- Open By department & job title for the same comparison split by department and job title, day by day, with Difference and % Difference.
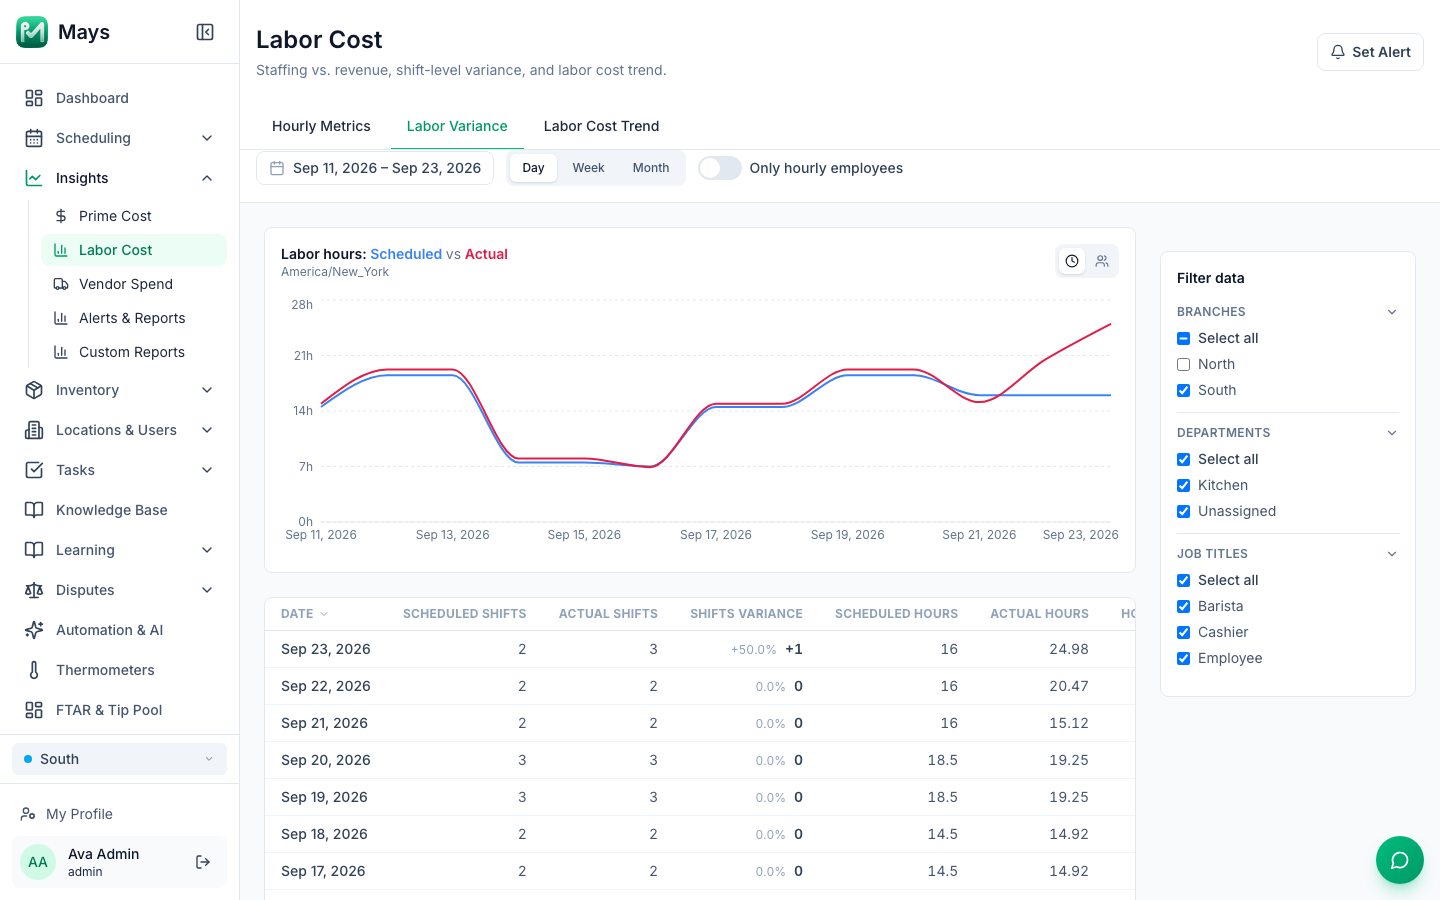
- Actual Shifts counts time clock punches, so someone who clocks out and back in counts twice.
- Scheduled includes open shifts and shifts that haven't been published yet. By department & job title leaves open shifts out, so its totals can be lower.
- Watch the colours: in the main table, red means fewer than scheduled. In By department & job title, red with ↑ means more than scheduled.
- The Departments and Job Titles filters only change this tab.
Labor Cost Trend: labor as a share of sales
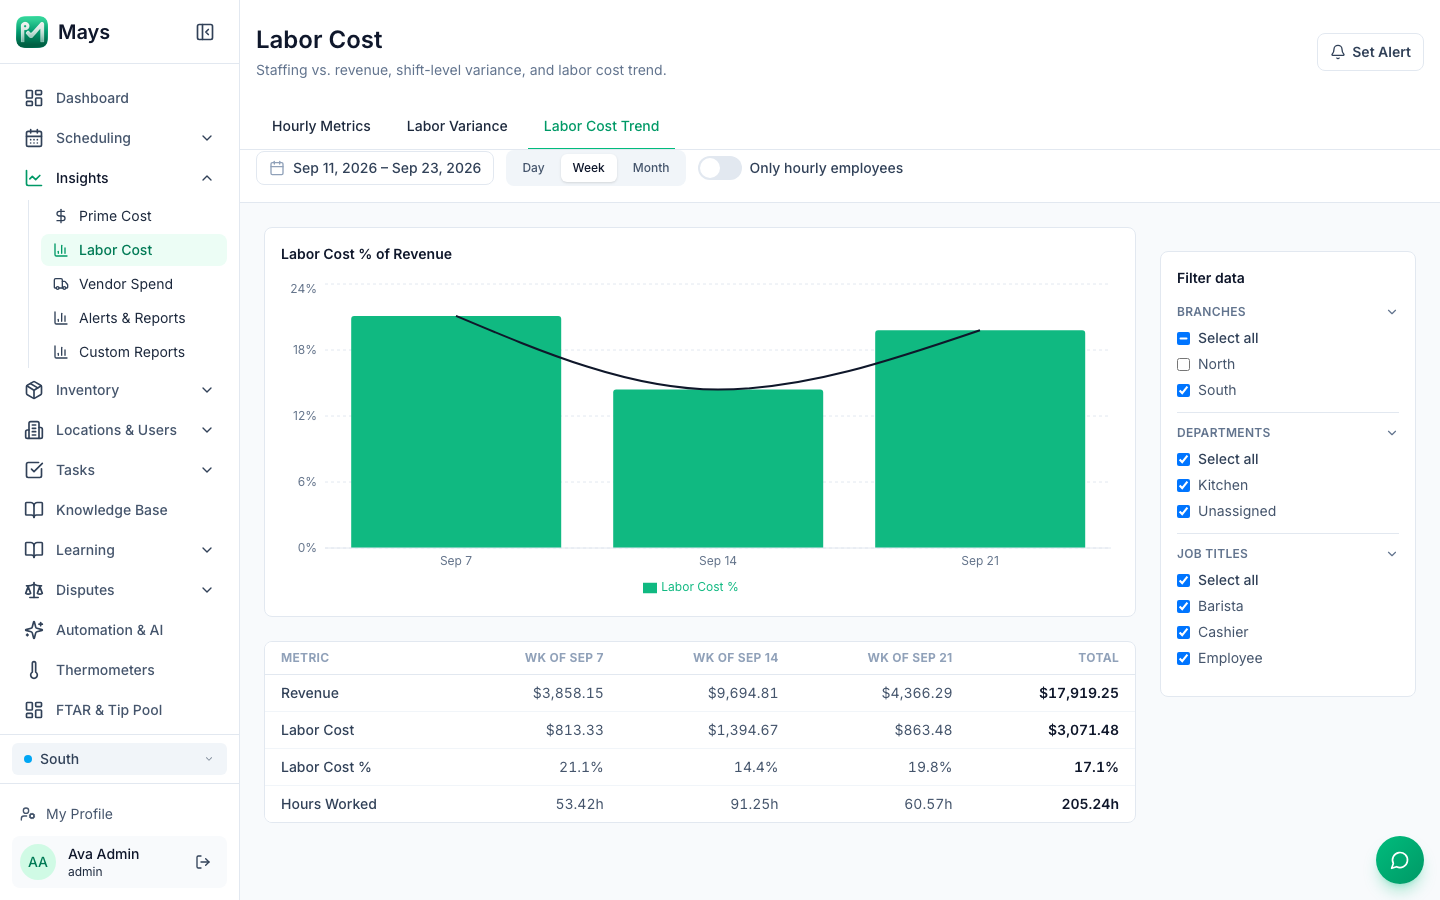
Bars show Labor Cost % for each day, week or month, with a trend line. The table below has Revenue, Labor Cost, Labor Cost % and Hours Worked, plus a Total. These are the same numbers as on Prime cost.
Good to know
- Labor cost is hours worked times wage, plus overtime. Hours come from finished punches, approved or not. Overtime (weekly, daily, double time and 7th-day) is priced the same way as the pay summary: by your overtime settings in Scheduling → Settings and, with Labor law compliance's Overtime law on at a location, by the law at its address where it's more protective (see Labor & compliance). On the heatmap, a punch's overtime pay lands on its last hours. People on a weekly salary add a seventh of their salary for every day, except on the heatmap. A punch with no wage saved is costed at the wage on file today — the person's own, else the position worked, else (with no position) their main position's. Set wages under Positions and wages.
- Departments and job titles: the department is the person's department. The job title is the position on the shift or punch; without one, it's the person's role, such as Employee. See Departments.
- Filters and new options: when you change the dates and a department or job title appears that wasn't in the list before, it starts unticked and is left out until you tick it. Unticking everything shows everything.
- Days are each location's own days, in its time zone. Weeks run Monday to Sunday.
- Set Alert, at the top right, creates a labor % alert. See Alerts and scheduled reports.
- The filters hide on narrow screens. If you don't see Filter data, make the window wider.
- There's no export. For a weekly or monthly email, schedule a Labor Summary report.
- For a single location's week, the schedule builder and Scheduling → Reports have their own labor numbers. See Scheduling reports.