Everyone except admins sees only the locations they're assigned to. This is how that works for managers and for people who work at more than one store, on the web and in the app.
Who sees which locations
Who | What they see |
|---|---|
Admin | Every location, whether or not they're assigned to any. In Scheduling, an admin who is assigned to particular locations sees only those. |
Manager | Only their assigned locations: the schedule, the people, the checklists and the time clock there. A manager assigned to North doesn't see South. |
Employee | Only their assigned locations. |
Custom role | Only their assigned locations, even with every permission ticked. |
Everyone who isn't an admin needs at least one location. Without one they see nothing, and the web form won't save without one either.
The app sometimes says branch instead of location. They mean the same thing.
Change someone's locations
- Go to Locations & Users → Users and open the person.
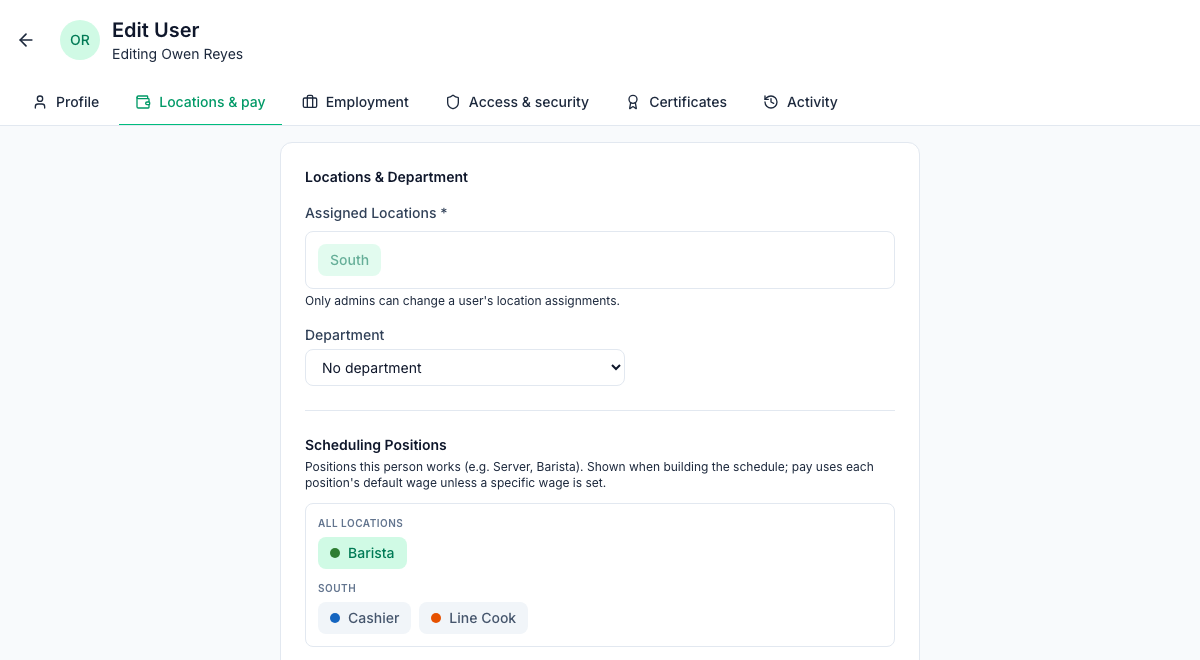
- On the Locations & pay tab, click the locations under Assigned Locations to add or remove them.
- Click Save Changes.
Only admins can change the locations of someone who already exists. For managers the locations are greyed out, with the note Only admins can change a user's location assignments. When a manager adds someone new, they can pick from their own locations only.
Switch location on the web
The location switcher is at the bottom of the sidebar, above My Profile.
- Click the location's name.
- Under Switch location, click the one you want.
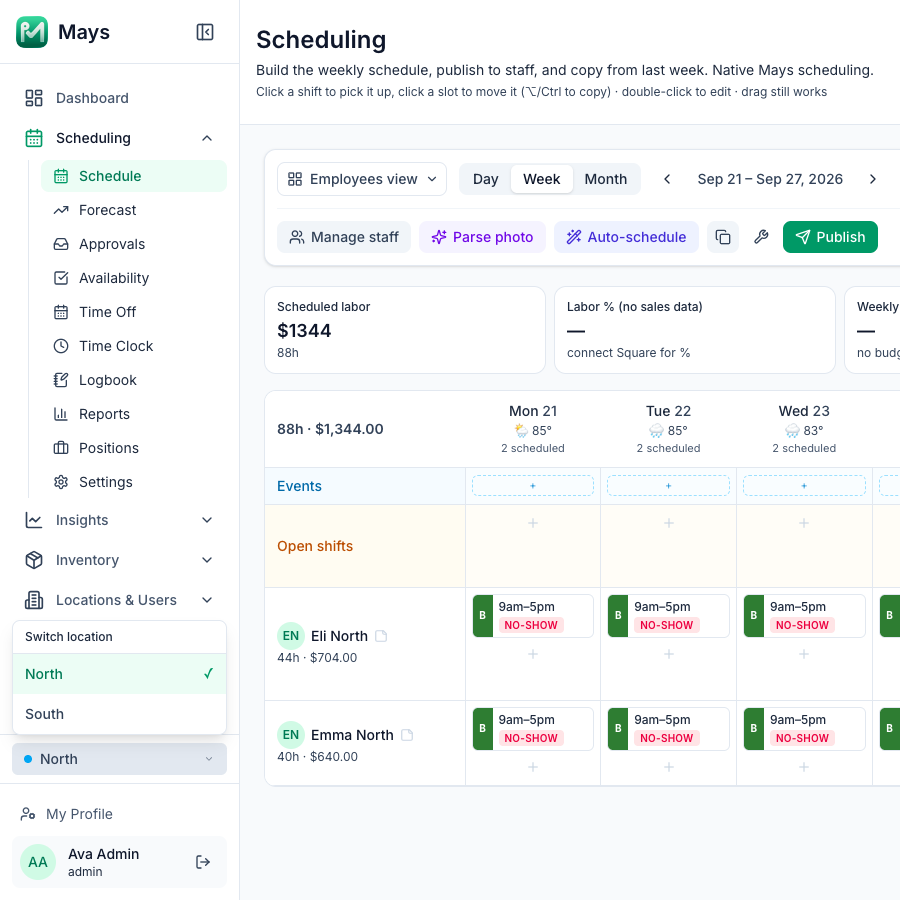
- With one location, the switcher just shows its name.
- It lists active locations only, and there's no All Locations choice.
- Your choice is remembered in this browser, per organization.
- Pages that follow it: Tasks, Task Templates, Scheduling, Inventory and the Insights filters, among others.
- Pages with their own location filter: the Dashboard (it starts on All Locations) and Team members (All Locations). The Task Templates filter starts on the switcher's location but also offers all locations.
Admins with assigned locations: the switcher lists every location, but Scheduling shows only the ones you're assigned to. If you pick another location, its schedule stays empty. To schedule it, add it to your own Assigned Locations.
In the app
Screen | Several locations |
|---|---|
Tasks (managers and admins) | Chips at the top, All and one per location, when you have tasks at more than one. |
Tasks (staff) | If your location asks you to clock in first, you see the tasks of the location where you're clocked in. See Why can't I see my tasks? |
Clock in | The Clock in button always uses your first location, the one on your Profile. At another store, use its kiosk or NFC tag. See Clocking in and out on your phone. |
Schedule | Your shifts at every location, in one list. Open shifts come from all your locations. |
Manage schedule (managers) | Pick the location at the top: chips on iPhone, Branch on Android. |
Chat | You can message people who share a location with you. Admins can message everyone. In New Message, each person is listed under their first location. |
Team (managers and admins) | All branches and one chip per location, when you have more than one. |
Profile | Shows your first location only. |
Good to know
- Managers only manage people at their own locations. On the web and in the app, they see and edit the people who share one of their locations. They can't edit other managers or admins.
- Several businesses? Locations belong to one organization. If you work for more than one business on Mays, switch between them with the Organization card in the app's Profile, or the organization switcher in the web sidebar. See Signing in on web and mobile.
- A location set to Inactive disappears from the switcher. See Add and manage locations.
- For what each role can do, see Roles and permissions.